After much thought, Bake Like a Beekman will be moving to a Facebook only group. By moving to Facebook, it allows our bakers to post their own photos without having to submit them via email. We believe this will allow for greater interaction between group members.
If you're interested in keeping up with our bi-weekly recipe selection, join us on Facebook at
https://www.facebook.com/groups/558084024245499/
We hope to see you there!

Sunday, June 15, 2014
Tuesday, June 10, 2014
You Chose... You Made!
It's always a pleasure to see what our Beekman Bakers decide to make when we do a readers choice recipe. Have you found your favorite?

Sue from NJ selected the Strawberry Shortcake with Balsamic Syrup. "What an amazing dessert to serve to my family after dinner on a beautiful Sunday evening. I was able to bake and assemble dessert easily after dinner using strawberries I picked earlier in the day at a local farm allowing 'pick your own.' Another awesome recipe!"
Sunday, June 1, 2014
It's Your Choice
Back by popular request, it's your turn to bake/make your favorite recipe from the Heirloom Dessert cookbook. Submit your creation for inclusion on the blog and you'll be entered to win an a Beekman 1802 t shirt autographed by Brent and Josh! Deadline for submission is Saturday, June 14.
Happy baking/making!

Happy baking/making!
Friday, May 23, 2014
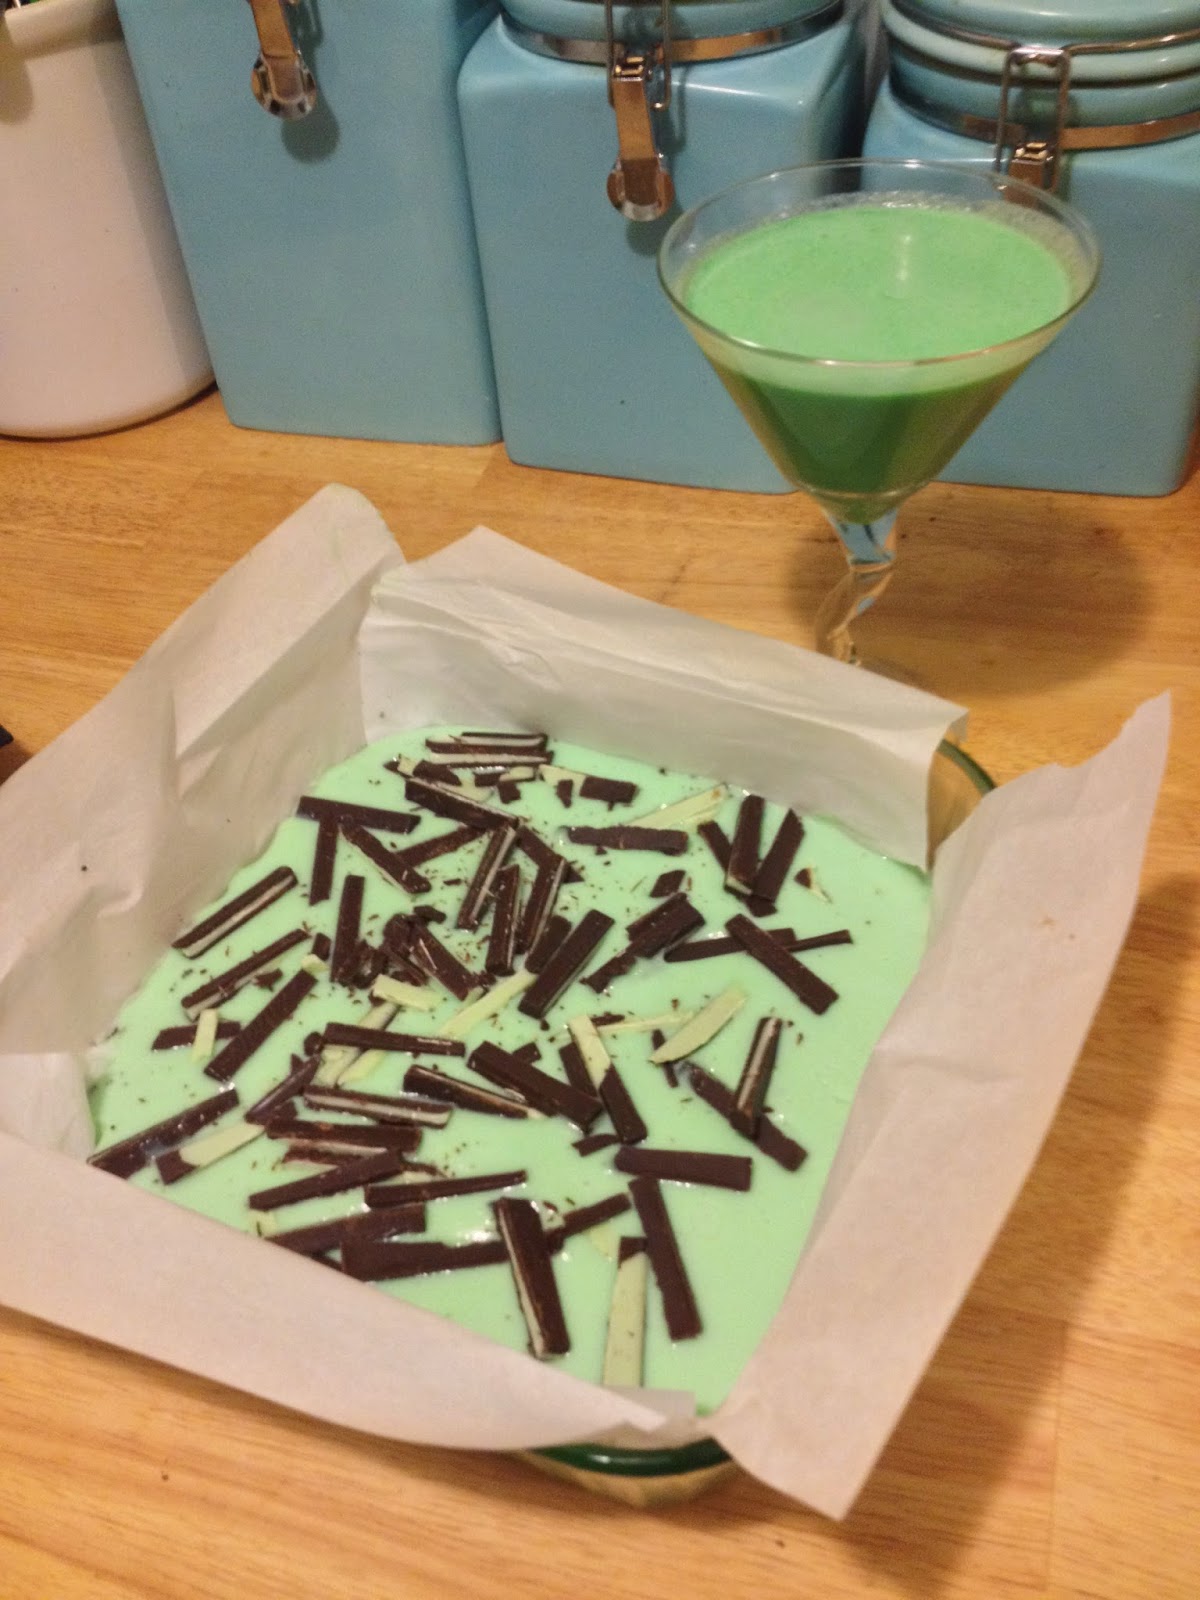
Going Green - Mint Green That Is!
Refreshingly sweet with a color that can't be beat, our Mint Bar selection is having Bake Like A Beekman members seeing green!


John from MI
John decided to pair his mint bar creation with a grasshopper cocktail. He couldn't resist!
Sue from NJ
Sue is having a great time baking and making all the recipes from the Heirloom Dessert cookbook. These mint bars are definitely a hit with her family!
Monday, May 12, 2014
Step Aside Girl Scouts... Mint Bars!!
Mint is starting to pop up in the gardens and inspired the recipe selection this week. If you thought Thin Mint cookies from the Girl Scouts were addicting.. just wait until you try these!

Baking Like a Madman! John Catches Up
One of our regular contributors fell a bit behind with our baking selections but played catch-up recently and submitted these photos. There was a lot of 'good eating' at John's house!


Chocolate Éclair Cake
Lemon Poppy Seed Pound Cake
Olive Oil Cake
Pancake Cake
Monday, May 5, 2014
Going Bananas!
Our recipe for this two week time frame was a throwback to childhood: Banana Pudding with Vanilla Wafers. I remember my Mom making this family favorite and it was oh, so good! Let's see what our Beekman Bakers did with this classic:

Sue from NJ
When Sue submitted her photo, the banana pudding was in the fridge chilling.
"I can't wait to try this later! It's in the fridge chilling. Taste tests on the vanilla wafers indicate it will be a hit!"
Thursday, May 1, 2014
Bernie is Catching Up!

Bernie from GA
Bernie, a regular contributor to Bake Like a Beekman sent in this photograph of his creations as he took advantage of "Catch up" week. He's so talented!!
Sunday, April 27, 2014
Banana Pudding with Vanilla Wafers
A classic to bring back those childhood memories. Effective this week, we'll be running recipes for TWO WEEKS. I've received some feedback that trying to do a recipe a week was a bit difficult (on the budget, the waistline, as well as on the schedule.)
How creative can YOU get with banana pudding?

How creative can YOU get with banana pudding?
The Pancake is Not Just for Breakfast Anymore!

Maria from IL
" The pancake cake was a recipe I'd been wanting to try for a while since it was the one pictured on the cover. It was super easy to make the pancakes, but I was nervous about flipping them. I managed to get five 8-9" pancakes out of the recipe and assembled the cake the next day. My kids loved the 6" extra pancake by itself and I think I will use this recipe for regular pancakes from now on! I think for the filling though, I may use a sweet filling versus the more cheese/yogurt flavored filling, which was good especially with the maple syrup on top, but I think it was a bit too powerful. Love this dessert though!"
Tuesday, April 22, 2014
Cake for Breakfast?
This week, we'll take one look at the book cover for our recipe inspiration. How will you shake up this recipe and make it your own?

Sunday, April 6, 2014
Playing Catch Up
We all have busy lives and sometimes you 'want' to bake, but your schedule just allow you the time to do so. This is your make-up week. Select one of the recipes you missed (or if you haven't missed a week... make your favorite again) to make and share!

Creamy Chocolatey Goodness!

Maria from IL
"This was quite a challenging recipe for me to do mostly because I had to make the vanilla pastry cream for the filling. After two tries, the first forgetting to put sour cream and whipping cream into it. I was successful! Instead of making one large 9x13 pan, I separated it into six mini chocolate éclair pies. It turned out great! I used graham cracker crumbs instead of whole crackers. Suffice to say, it will be different next time! It's a yummy and rich dessert. I love it!"

Sue from NJ
"Chocolate Éclair Pie. It's one of those moments when mine doesn't look like the photo in the cookbook.. but yummy it is!! I can see how it can only get better looking the more I try it and I most definitely will. I used boxed crackers, but will attempt making the ones in the book in the future. I let the glaze cool too much before spreading and I believe my cream could use more practice... but it tastes great! I'm still having fun trying new recipes..thanks!"
Sunday, March 30, 2014
Chocolate Eclair Pie
This week, we'll honor Brent's Grandmother with one of her family classics, the Chocolate Éclair Pie. The recipe is found on page 121, although, you'll need to refer to page 117 for the pastry cream recipe. Pie is great any time of year!

Thursday, March 27, 2014
Bake or No Bake? You Made Your Decision!
This week, our Beekman Bakers had a choice of a baking recipe or a no-bake recipe. Let's see what they decided...


Liz from CA
"I was excited to try olive oil poundcake and make good use of an impulse purchase - Tunisian olive oil from Trader Joe's. My oven is having some trouble, and the cake ended up a little brown. I had reservations about photographing the cake and posting it, but then drew inspiration from Julia Child and decided to "never apologize!" I trimmed the sides and ends off the cake, iced it, and served it up. Oh, the no-bake cookies were simple and fun."
Missy from MA
"My olive oil pound cake may not be the prettiest thing but it was delicious! The citrus combination was perfect and the cake's texture is quite light and airy compared to a typical butter pound cake. This recipe FILLED my loaf pan and nearly oozed over while baking but I think I stopped short of whipping the egg portion of the mix enough. It deflated once I removed it from the oven. Also, I had to bake my cake around 12 minutes longer than the recipe suggests. The tart and sweet glaze was the perfect topping. We took it to a dinner party last night and everyone love it!"
Reynaul from VA
"These cookies were so easy to make, my 2 1/2 year old loved helping me stir these up. I didn't have crunchy peanut butter on hand, but they came out yummy all the same! They don't make a whole lot which is great and you can make so may different variations with the nuts, dried fruits, adding chocolate chips, etc. This will definitely stay in the rotation!"
Maria from IL
"The AITC No-Bake Cookies were SUPER EASY! I even had my daughter help. She loved it! We used Peanut Butter and Company's Cinnamon Raisin Swirl Peanut Butter instead of the crunchy peanut butter and we also added about 1/3 of a cup of chocolate chips. They came out great! We scooped the cookies and formed them into balls for easier consumption. I put them in the fridge to have them set a bit more solid. Definitely making these on a regular basis!"
Maria from IL
Note: Maria was super ambitious this week and made both selections! Good for you, Maria!
"The Olive Oil Pound Cake was super easy too! I decided to do what I did with the lemon-Toasted Poppy Seed Cake and bake these into mini-loaves for easier sharing. I was able to mostly fill about 3/4 full 10 loaves and 6 half full loaves. Suffice to say, the 3/4 loaves were the way to go! They baked for about 29 minutes with the less filled pound cakes being a bit browner than the others. The icing came out a bit thick and I needed more to spread them on the rest of the mini loaves. They turned out great!"
Sue from NJ
"I was so happy that my selection, the Olive Oil Pound Cake was one of the selections this week. I actually had attempted this cake in the fall.. a huge disaster back then. I am so happy I was able to be successful this time... how flavorful and moist! I did extend the amount of time the eggs and sugar were mixed this time and the cake could have used a couple more minutes for the center/top to fully bake (so close!), but overall, a moist cake! My husband mentioned it would be awesome to grill the slices and add fresh fruit in the spring/summer. As always, I'm enjoying my baking experiences with the Beekman's! Thanks!"
Monday, March 24, 2014
To Bake or Not to Bake.. That is the Question...
There are so many great recipes to choose from, and at the suggestion of some of our more active members, we're offering up two choice this week. If you're tired of baking, we've got you covered. If you can't get enough cake.. there is a choice for you too!

Saturday, March 22, 2014
A Taste of Spring.. Lemon Poppy Seed Cake
When you think of spring, you can't help but think of lemons with their fresh clean taste on the ever warming days. Here are the creations for the Lemon Poppy seed Cake..


Sue from NJ
"My house always smells fantastic when I Bake Like a Beekman --- spring is in the air (although it's still way too cold near me!) Lemony fresh!"
Maria from IL
"I love lemons and poppy seeds! While I have had my share of lemon poppy seed muffins, this was the first recipe for this yummy dessert that I have tried! Let me say it was interesting to say the least! Especially with the toasting of the poppy seeds and then the butter and greek yogurt. Made for interesting mixing for sure! Sadly, my kids are not fans of lemon, but they tried small pieces anyway. I followed the recipe exactly, but with one change... I broke out the mini loaf pans and loaf liners to make mini cakes! They turned out great and they are easy to share too!"
Wednesday, March 19, 2014
Your Favorite Series: Tita Patty's Famous Filipino Fruit Salad

My Tita (Aunt) would make this fruit salad for every Christmas Eve party and any other family gatherings we've had. I loved it as a kid and I love it now!
At Filipino gatherings, it is a 'requirement' for you to make WAY MORE food than you would as there is a term called 'baon' or 'leftovers' that most Filipinos expect after a gathering
You are expected to bring some food with you.. enough food for future meals for the next few days!
Tita Patty's Famous Filipino Fruit Salad
Ingredients:
1 30oz Can of Fruit Cocktail , drained
3oz Cream Cheese
1/2 C Sour Cream
1/2 C Sweetened condensed milk
1/2 C Young coconut strings (macapuno)
1 Medium red apple, chopped (optional, I used Gala)
Mix all the above ingredients together and refrigerate
Sunday, March 16, 2014
Welcome Spring! Lemon-Toasted Poppy Seed Cake
It's time to usher in spring with the delicious taste of lemon and poppy seeds.

Your Favorite Series: Lemon Bars or Tart, You Choose...

One of our favorite recipes is lemon bars, a recipe from my bubby Raleigh's grandmother Olive Batten.
Raleigh's mom shared the recipe with us a few years ago and it's been my 'go-to' recipe whenever I need to whip up something really delicious quickly. Over the years, the recipe has morphed into a tart. It started when I could not find my brownie pan one day.
It can be easily dressed up with some whipped cream and berries.
Lemon Tart*
*tweaked from original recipe of lemon squares by Olive W. Batten (Raleigh's grandmother)

Pulse in food processor till combined:
1 cup flour
½ cup butter
¼ cup powdered sugar
½ teaspoon salt
Press mixture into and up sides of an 8 ½ inch fluted tart pan* with removable bottom.
Bake for 15 minutes (till lightly browned)
Meanwhile, combine in a large bowl:
Zest of 1 lemon
1 cup granulated sugar (brown or turbinado sugar can be used to bake “brown sugar lemon tart”)
2 tablespoons flour
½ teaspoon baking powder
Pinch of salt
When tart crust is ready, remove from oven, set aside and add to the sugar mixture:
2 eggs
Juice of 1 lemon
Whisk to combine fully (mixture will fizzle a little) and pour into hot crust.
Return to 350F oven and bake for 20 to 30 minutes till set
Cool on wire rack till lukewarm. Remove from tart pan and cool completely on wire rack before slicing. Dust with powdered sugar and serve
*can be made in a regular square brownie pan

Wednesday, March 12, 2014
Your Favorite Series: Nama's Old Fashioned Rolled Sugar Cookies

When my seven nieces and nephews were growing up, our family tradition was spending the day together baking my grandmother's sugar cookies.
I learned to bake from Nama when I was 4 years old and baked Christmas cookies with her until I was married.
I wanted to share Nama's sugar cookie recipe with you.. enjoy it and be sure to pass it on. Good recipes are meant to be shared.
Nama's Old Fashioned Rolled Sugar Cookies
Ingredients
1/2 C Unsalted butter
1C White sugar
1 Egg
1 Tbl Milk
1/2 Tsp Vanilla
1 1/2 C All-purpose flour
1/4 Tsp Salt
1 Tsp baking powder
Directions
Cream butter in mixing bowl. Beat in sugar, egg, milk and vanilla. Add flour, salt and baking powder. Mix well. Divide dough in half and wrap in waxed paper. Chill in refrigerator at least one hour. Use plenty of flour on the board, rolling pin and cookie cutters to prevent sticking. Roll out dough 1/4 inch thick and cut out shapes with cookie cutters. Bake at 375 degrees on an ungreased cookie sheet for 5-8 minutes.
Nama's Cookie Frosting
Mix 2 Tbl of hot water to 1 cup powdered sugar. Mix with a knife. Tint with a drop or two of liquid food coloring. Note: Using hot water makes the frosting shiny. Add hot water as needed to perfect consistency.

Sunday, March 2, 2014
Your Favorite Series: Jewish Cookies (Mandelbrot)

Back in the 60's, my mother baked all the time, and she loved to swap recipes with everyone. Our neighbor, Ida Lipowsky, gave my mother this recipe over 40 years ago. It has become one of our family favorites, and we always request it every holiday. But, according to my mom, Ida never told her what the cookies were called, so because the Lipowskys were Jewish, my mother just called them 'Jewish cookies!'
About a year ago, I decided to research these cookies and found out that they really are traditional Jewish cookies called Mandelbrot, which when translated means 'Almond bread.' They are actually a version of biscotti, and of course, everyone who makes them, has their own version of the recipe.
Ingredients:
3 Eggs beaten
1/2C Vegetable oil plus 2 Tbl
3 1/2C All Purpose Flour
1C Sugar
1 1/2 tsp Baking powder
1/2C Raisins
1 Jar Marachino Cherries cut in half
1/2C Walnuts or any preferred nuts
Sugar and Cinnamon
Preheat oven to 350 degrees.
Sift together dry ingredients. Add the eggs and vegetable oil along with the cherries and walnuts. Coat your hands with vegetable oil and mix together with your hands until combined. Separate dough into thirds. On a baking sheet, pour 2 Tbl of oil and coat thoroughly. Form three rectangular mounds of dough on the cookie sheet. Sprinkle generously with sugar and cinnamon and bake for 30 minutes.
Allow to cool and cut each rectangle into slices.
Your Favorite Series: Grandma's Cannoli

I tossed around whether or not to share this recipe because it is considered what we would call a 'family secret, ' but I live for the idea of sharing from my kitchen to yours. Plus, I shared this recipe with Sandy Gluck a couple years ago; I was curious to see if it was going to end up in Martha Stewart Living or Everyday Food.
Being from a Sicilian family, I was never a stranger to good, comforting food. The holidays were always big events with emphasis on the desserts! Everyone always looked forward to Grandmas cannolis! This has been in her family for generations, so I guess it could be considered an heirloom recipe. Grandma taught my mother and her sisters how to make these delectable treats, and my mother taught me and my sister. Each year, just before all the major holiday baking, we spend an entire day making hundreds of shells. We make cannolis to serve during Thanksgiving and Christmas, when company comes over, when we go to visit friends and family we bring cannolis, as well as share them with co-workers. We also freeze a couple dozen shells so we have them ready for Easter.
Making the shells is just like making fresh pasta; as a matter of fact, we always use a pasta machine (the hand crank kind) to roll the dough, as it rolls the dough perfectly thin for the shells.
The recipe does call for frying the shells in lard. That is what my grandmother used, and insisted they be fried in the traditional manner! We still use lard today. Of course, one could use vegetable shortening, but Grandma wouldn't approve!! The recipe makes about 2 dozen cannolis.
Cannoli Shells:
1 3/4 C All Purpose Flour
1/2 tsp Salt
2 Tbl Sugar
1 Egg slightly beaten
2 Tbl firm, unsalted butter cut into small pieces
1/4 C Dry white wine
1 Egg white, slightly beaten
Lard for deep frying
Cannoli forms (found in kitchen or baking supply stores)
Heat at least 3-4 inches of lard in a heavy pot or deep fryer to 350 degrees.
Sift flour, salt and sugar onto a large counter surface. Make a well in the center; In the well place eggs and butter. With a fork, slowly work the egg into the flour, from center out, until all the flour is moistened. Add wine, 1 tablespoon at a time until the dough begins to cling and hold together. You may not use all the wine. Using your hands, form dough into a ball. Cover with a towel and let rest for 15 minutes.
On a floured surface, roll dough out to 1/16" thick. Using a 3 1/2" round cutter, cut circles in the dough. Wrap the dough circle, loosely, around a cannoli form, sealing the edge together with a little egg white.
Fry the shells, 2 or 3 at a time, for about 1 minute or until lightly golden. Using tongs, remove from the fat to drain on paper towels. Cool 5-10 seconds then carefully slip the shell off of the form. Repeat with the rest of the dough circles. Cool completely before filling.
Cannoli Filling:
The filling is very simple like making pudding. It's more of a Sicilian style and does not contain Ricotta cheese or candied fruits which is more northern Italian style.
1 quart Half and Half
1C Sugar
1/2C plus 1Tbl Cornstarch
1 Cinnamon Stick
1 tsp Vanilla
1 Hershey Bar chopped into tiny pieces
Combine all ingredients, except the vanilla in a heavy sauce pan. Slowly heat until boiling, whisking until the sugar has dissolved and the mixture has thickened. Remove from heat, whisk in vanilla. Transfer to a bowl and place a piece of plastic wrap on the surface of the filling to prevent a skin from forming. Cool, then refrigerate until chilled.
When chilled, remove the cinnamon stick, then pass the filling through a food mill use the disc with larger holes. Alternately, you can beat the filling with a mixer. Fold in the chopped chocolate. Cover, and keep refrigerated until ready to fill the shells. Fill the shells just prior to serving.
To Fill and Serve Cannolis:
Place filling in a pastry bag fitted with a large plain tip, or use a small spoon. Fill the desired number of cannolis through each end. Dips ends of cannoli in ground almonds to light coat the exposed filling. Place on a large, rimmed baking sheet. When the desired number of Cannoli are filled, lightly sift confectioners sugar over the top and serve.
They are addicting!
Your Favorite Series: Cream Cheese Cookies with Confectioners Sugar Glaze

I would love to have a true heritage recipe; but my mom was an excellent cook and I had a grandmother who worked at a German bakery in New York. Our tables were always filled with excellent sweets, but not always homemade.
I stumbled upon a cookie recipe many, many years ago. After a little changing, it has become a 'go to' for me no matter what the holiday or celebration with just a change of the cookie cutter and decoration.
Cream Cheese Cookies with Confectioners Sugar Glaze
Cookie Ingredients:
1C Sugar
1C Butter (2 sticks) softened
4 oz Cream Cheese, softened
1/4 tsp Salt
1 tsp Vanilla
1 Egg Yolk
2 1/4 C All Purpose Flour
Glaze Ingredients:
1C Confectioners Sugar
1/4 tsp Vanilla Extract
2-3 T Milk
Decoration:
Assorted colored sugars
Directions:
Cream sugar, butter, cream cheese, salt and egg yolk until light. Add flour, blending well. Divide dough into two sections covering with plastic wrap. Chill dough at least 1 hour.
Line cookie sheets with parchment paper. Preheat oven to 375 degrees.
Using one section at a time, roll the dough to 1/8 - 1/4 inch thick. Cut into desired shapes and bake 7-10 minutes or until a light golden on the bottom of the cookie. The size of the cookie will determine the baking time; adjust accordingly. Cool cookies on a rack.
Once cookies are cooled, make the glaze. Combine all ingredients together to desired consistency. Brush over cooled cookies and add colored sugars as desired. Enjoy!
Sunday, February 23, 2014
Goodbye February, Hello March! Welcome March With Your Family Favorite!
We're going to do something a little different this week.. I'd like YOU to share your favorite family desserts. Is there a favorite that Mom always made? Did Grandma or Grandpa make something that made every holiday special? Make it and share!
The idea behind the Heirloom cookbook series is about honoring heirloom recipes of the past and creating new.
We'll run this recipe selection for two weeks. As you submit your creations, please share the recipe (step by step instructions) so others may add it to their cookbook.
I'm anxious to see your family favorites!
Saturday, February 22, 2014
Peanut Butter Sandwich Cookies: Move Over, Girl Scouts!
This time of year, many people are addicted to the Peanut Butter Sandwich Cookies that are frequently sold by the Girl Scouts. I believe they have some stiff competition!


Bernie - GA
"For these Peanut Butter Sandwich Cookies, I used crunchy peanut butter in the cookies and creamy peanut butter in the filling. These are over the top rich and decadent."
Missy - MA
"For this recipe I used in-store ground peanut butter, unsweetened, natural. I thought the peanut butter looked a bit dry, so when I mixed the batter together I added one tablespoon of coconut oil to the mixture. For me, this recipe yielded 24 fairly large cookies. They puffed a bit more than I would have liked, which caused them to lose a bit of the forked crosshatch detail on the tops. The flavor fell a bit flat for me but I think it has to do with the peanut butter that I used. Also, with regards to texture, I was really hoping these cookies would be crispy on the edges and moist, almost chewy on the inside (like the peanut butter cookies of my childhood) but they are not, they are crispy all the way through. I used creamy peanut butter in the filling mixture. The filling is tasty, fluffy and it's creamy texture is a nice contrast to the crisp cookies. I haven't eaten one of the constructed sandwich cookies yet but I have a feeling the filling is going to ooze right out at the first bite due to the crisp cookie texture."
Maria - IL
"I was really excited to do this recipe as I had an excess of peanut butter to use up. This was a very simple and easy recipe to follow. It seems that 20 minutes is a bit much as some of the cookies got a bit browner than I had intended them to be, so, the next batch I did at 18 minutes and that was just enough! I decided to kick it up a bit and make two different fillings. I intended this recipe to be a double batch, but it ended up being a batch of 16 very large cookies! I ended up using most of the filling anyway which were Nutella and Honey Peanut Butter. SO GOOD!"
Sue - NJ
"The cookie jar is full! Thanks!"
Monday, February 17, 2014
Recipe of the Week: Peanut Butter Sandwich Cookies

Our recipe this week was selected by Justin. He's opted to move away from all the cakes and selected the Peanut Butter Sandwich Cookies found on page 102. I have a feeling these will rival any Girl Scout cookie!
Sunday, February 16, 2014
"You Pick" Winner! Congratulations!

A great big congratulations to Jo-Ann for winning our double giveaway of a Beekman 1802 baseball cap (highly collectible!) and vintage William Beekman t shirt, both signed by Brent and Josh! To claim your prize, drop an email to BeekmanBakes@Comcast.net with your mailing address so we can rush the items to you!
Thanks to everyone for participating in the "You Pick" recipe selection! You never cease to amaze me with your talents, and your commitment to our little baking community.
Saturday, February 15, 2014
You Picked - You Created!
You could almost hear the mixers 'whirring' and feel the heat from the ovens with these wonderful submissions in the "You Pick" contest! Congratulations to everyone for such outstanding work!


Bernie
"I decided to bake a birthday cake for my friend George. He told me that special occasions with his family always involved a coconut cake and I was excited to try the coconut cake in the book. The cakes baked up quite tall, so I decided to split the layers and make a four layer cake. The lemon curd itself is divine. It was a big hit at the birthday party. Combined with the fluffy white cake topped with light meringue frosting, it was scrumptious! I saved one piece to eat the next day and it was even better. I will be baking this cake often."
Jo-Ann
"For this contest, I chose the Blondies with White Chocolate and Macadamias. This is the first recipe I've made from the Heirloom Desserts cookbook. I chose it because I already had all the ingredients on hand, so not having to slog through the snow and slush to get to the grocery store was a big plus! I used fresh eggs from our community farm conveniently located right next to our house! They came out great! My son ate three for dessert last night! I hope I win!"
John
"This week I chose to make the Stained Glass Gelatin Cake from the spring section. I was hoping it would make it feel a little spring-like with all this snow and cold weather! It didn't really come out as nice as I'd like it to be, but it does look very 'homemade.' It reminds me of my aunts 'Italian flag' jello she always makes for every holiday gathering which everyone loves! The tricky part to this is watching as the white lime gelatin is setting up for the first time. It sets fast!"
Justin
"I made the Do-It-All Yellow Cake with the icing from the coconut cake! It was so easy and it tastes great!"
Maria
"Since it was Chinese New Year, I figured I'd get into an 'Asian' theme and pick the Chocolate Rocky Road Potstickers! I'd been pondering making these for a while and it was so simple! I used the square wonton skins instead of round as stated in the book. Oddly enough, the potstickers they show in the book ARE the square kind, so, I was good. I found it easy to assemble and it was quick to make. Some of the filling sometimes oozed out of the openings, but with a dusting of cocoa powder/powdered sugar, it was heavenly! A nice quick dessert! I love the crunch and the chocolatey-nutty goodness! Yum!"
Missy
"My 'you pick' choice was the hello dollies. Well... they were scrumptious! We at them until they were all gone and then we ate the crumbs out of the zip-lock bag. I used good quality bittersweet (60%) chocolate chips in this recipe. So easy. So divine! I will surely make these again. For a recipe with so few ingredients it checked off all the boxes... sweet, salty, buttery, crunchy, nutty, spicy, rich, Yup!"
Sue
"Chocolate Rocky Road Potstickers. Delicious! In addition to being delicious, the best part for me was my husband and I worked together on these amazing treats. Simple, fun and yummy!"
Kenn
"There's nothing I love more than a delicious coconut cake, and that's what I got when I finished this recipe! The cakes were heavenly; light and moist. I used my favorite seven-minute frosting that included a bit of coconut milk and coated the outside with toasted coconut. Needless to say, this cake didn't last long!"
Subscribe to:
Posts (Atom)